
(The above picture is from www.nicolarandone.com/ divx-area/)
(The above picture is from
www.nicolarandone.com/
divx-area/)
hehe.. gotta love it ;-)
Learn how to 'backup' all those DVD's
you have.
There are a lot of options when it comes to getting the video off of a DVD and
onto a cd or our hard drive. Here I will try to narrow down the choices and
direct you to the best solutions.
Okay, so you have a DVD in your hands and you're thinking how nice it would be to have that on your hard drive so you don't have to keep putting in that disc ever time you want to watch it. Now you thinking, where do I start? Can I just copy the files using explorer? Unfortunately, the answer to that is no. The people in Hollywood have made it much more complicated than that. We can separate the process into three main steps :
 |
|
Figure 1 |
The Ripping stage, the Compressing (encoding) stage, and then the Burning stage (skipped if you're just going to leave the video on your hard drive, or it can be complicated if you want to have the CD Autorun and have icons read this for more info).
Each of the sets uses a different program. Here's a basic list of the software utilities used in each step:
| Software | Pros | Cons | Website |
| Smart Ripper | Nice graphical interface, | Sometimes doesn't authenticate the DVD | http://www.afterdawn.com/software/video_software/dvd_rippers/smartripper.cfm |
| CladDVD XP ** | Nice graphical interface, haven't had it fail yet | Can cut off .vob files prematurely | http://www.clonead.co.uk/ |
| DVD Decoder | Never used it | http://go.to/DanniDin |
** This is the software I will use in my tutorial. I think it's the best, SmartRipper would be my second choice.
| Software | Pros | Cons | Website |
| FlasK MPEG Encoder | Stable, Basic encoding tool | A little confusing, older/slower. | http://go.to/flaskmpeg/ |
| Xmpeg | Based on the FlaskMpeg, More options, easier to use | Can be unstable, designer site in French :-( | http://www.mp3guest.com/xmpeg_index.asp or a translated version => http://www.mp3guest.com/Xmpeg_Index.asp?l=US |
| DVD2AVI | Simple use, Fast, Good Graphical interface | Can be unstable, Some functions not available. | Not a direct link.. There are a could of different versions out. http://divx-digest.com/software/dvd2avi.html |
| Vidomi ** | Sweet interface, avi file playback, easy use, network distributed processing (oh yeah) | Hasn't been out long, not much support in the community available. | http://www.vidomi.com/ |
** This is the software I will use in my tutorial. They all are good though, I would recommend trying all of them.
Ok, so I lied.. there is another small step in the process. It's really a tutorial all to it's own though. And most people skip it. This is the step where you take care of little details like creating a CD cover, making the burned CD auto-play, and other things like that. I've made the tutorial available here.
| Nero Burning Rom** | |
| Easy CD Creator |
**The better of the two in my opinion. Doesn't much matter though. Whatever works for you.
Okay, enough with the general description of the software and process, lets get down to it!
Step 1 - Downloading what you need.
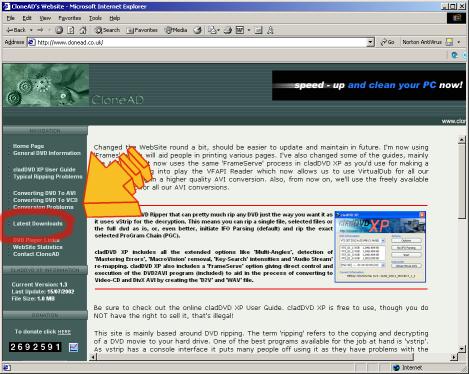
| Go to http://www.clonead.co.uk/ and download latest version of CladDVD XP that you can find. As of the writing of this tutorial, the latest was 1.3. Also download the latest ASPI from that site. I would recommend that you create a folder somewhere on your hard drive to hold all of your DVD tools. I use c:\DVD Tools. But whatever works for you. |

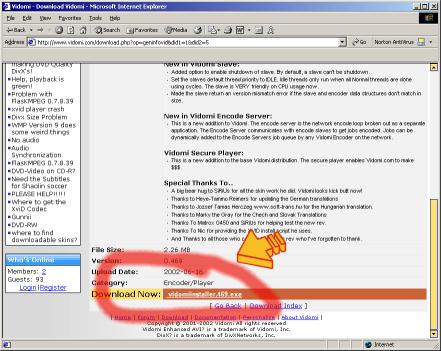
| Go to http://www.vidomi.com/index.php and download Vidomi. |

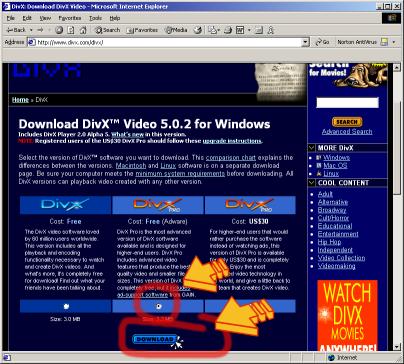
| Okay, last one. Now go to www.DivX.com/download/ and download the DivX Codec. This is the format that we will be recompressing to. There are others (VCD, XviD, etc.) but DivX is the best to use at this point in my opinion. I'm sure there are many who disagree. Anyway, get it. |
| So now you have all the software you need. Go ahead and install everything that you have downloaded and restart the computer. |
Step 2 - Ripping the DVD
| Now we get to the real "copying" stage of the DVD. Put the disc (make sure it's clean) into your DVD-ROM drive and click cancel to any of the autorun's that come up. | |
| Start up CladDVD XP |
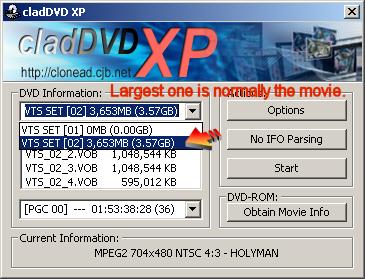
| In the DVD Information select the movie that you want to copy. Normally the largest one is what you want. Sometimes there are both widescreen and full screen versions of a movie, if that is the case, you'll need to experiment to get the right one. Try opening the vob files using any DVD player (PowerDVD is what I use) to see what you need. |
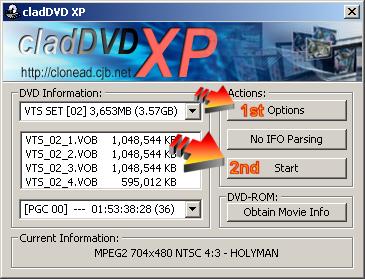
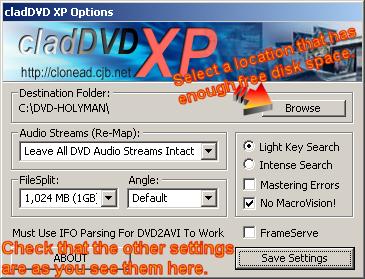
| Now click on options and set the destination folder, usually the default is file. Just make sure you have enough free disk space. Under audio streams, it's best to leave all of them (faster). But if you are pressed for disk space, you can just rip the ones you want (AC3 english, or whatever). |
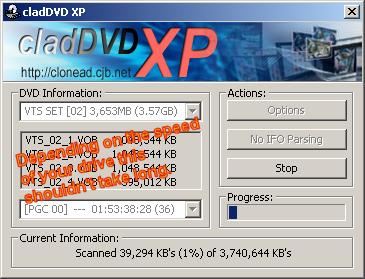
| Click Save Settings and then click Start. Once the progress bar reaches 100% you have the DVD on your hard drive! It's really big, but it's there. You should be able to play it in any DVD player you want now. |
Step 3 - Recompressing
So, now you have the files on your hard drive. Next we want to shrink that file size down. This step has a good and a bad part. The good first: You only have to do it once. All the setting that you are about to set are saved. The things that you will have to do each time I have put a * by. The bad? Well this does take a little while to setup the first time. Alrighty then, lets get to it!
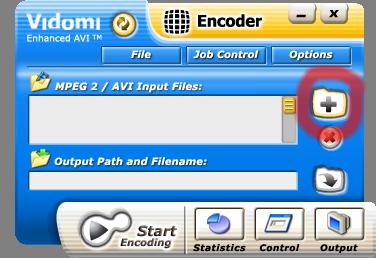
| Start Vidiomi* | |
| Switch to the Encoder mode * |
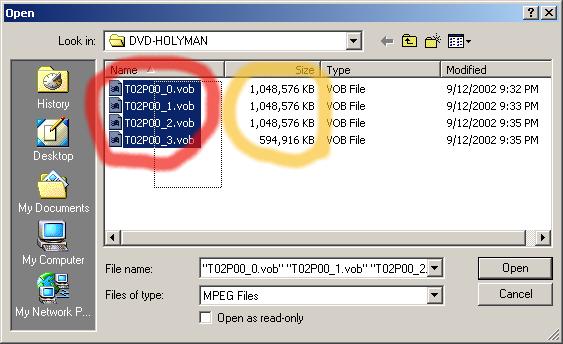
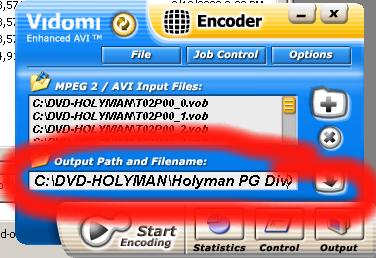
| Open the .VOB files that you ripped earlier* |
| All the files should be about the same size (except the last one), if they aren't something went wrong in the ripping stage. Try cleaning the DVD with a cotton rage and some alcohol and re-ripping it.* |
| Input the name and location for the movie to be recompressed to.* |
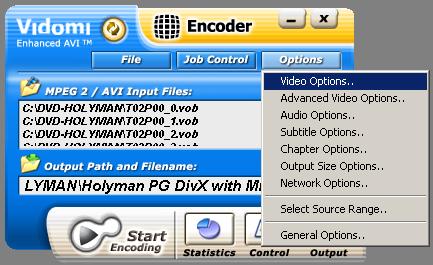
| Select "Video Options" from the Options menu. |
| Set the values as you see below, then click "Set DivX Network Codec Parameters." |

| Set the values as you see below, then click the "General Parameters" tab. |

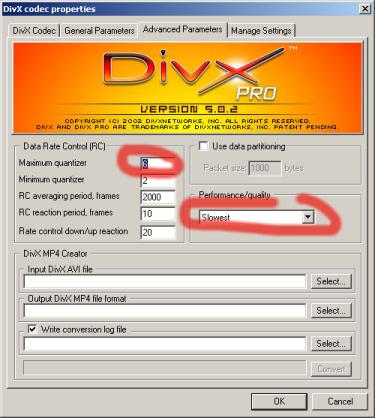
| Set the values as you see below, then click the "Advanced Parameters" tab. |

| Set the values as you see below, then click OK=>OK to get back to the main screen. |
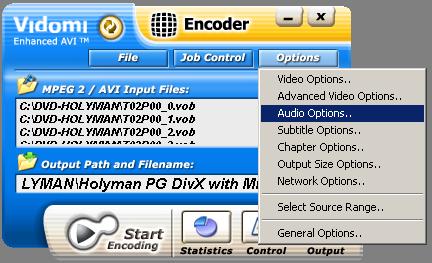
| Select "Audio Options" from the Options menu. |
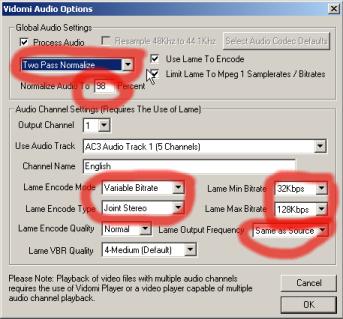
| Set the values as you see below, then click OK to get back to the main screen. |
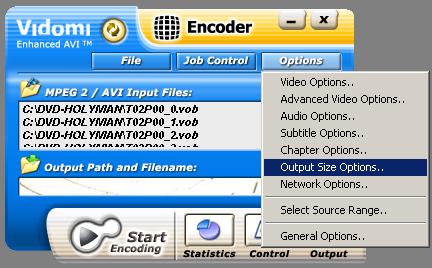
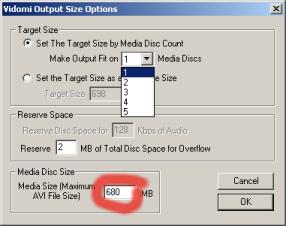
| Select "Output Size Options" from the Options menu.* |
| Set the values as you see below, then click OK to get back to the main screen. * |
NOTE:
If your final output comes out not looking poor or you have a long movie (>2-2.5hrs), it would probably be a good idea to set the "Disc Count" to 2. This means that you will have two output files instead of one.
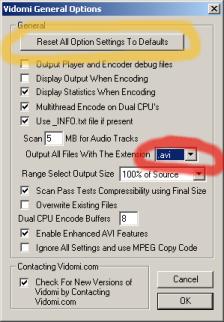
| Select "General Options" from the Options menu. |
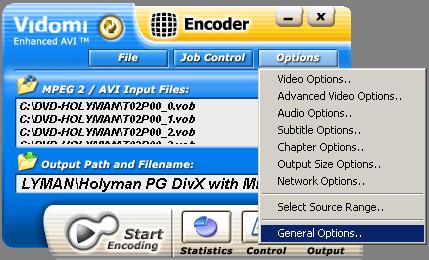
| Set the values as you see below, then click OK to get back to the main screen. Don't click the Reset button unless there is some problem. I just wanted you to take note of it. |
| Your now done with the hard part, setting everything up. Now comes the easy part for you (but hard for your computer) Click the "Start Encoding" button. * |
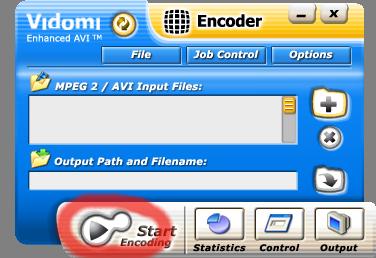
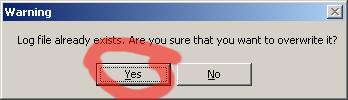
| If this message comes up, just click yes.* |
| If you want to see what your computer is doing, you can click the Output and Statistics button as I have done below. As I said before.. this will take a while. for me it takes about 5-7 hours depending on the length of the movie. It's the type of thing to start at night before going to bed. |

Step 4 - Burning
| Start whatever program you use to burn the files. | |
| Add the .avi file to the to-be-burned box, also add the DivX Codec that you installed. It includes a player, that way, you will know that you can play your CD in any computer without having to download anything. | |
| Click the burn Icon. |
That's it! You have now finished copying your first DVD!! Congrats